
If most of your visitors are from Google (organic) or social media sites, most probably they are directly visiting the HTTPS version.
But what if there are visitors who directly visit your site entering the domain in the browser?
In my case, I usually type “wps”, Chrome suggests “wpspeedmatters.com” and I press enter.
Browser by default sends the request to “https://wpspeedmatters.com” and later redirects to “https://wpspeedmatters.com”.
Table of Contents
Why HTTP to HTTPS is slow?
If you’ve set up https in your WordPress settings, then WP will take care of the redirection.
But it will be done by PHP.
Depending on your hosting provider and load, redirection via PHP can be slow. It’s better to offload it from PHP.
Step1: Configure Web Server for HTTPS redirection
Configuring web server like Nginx/Apache/LiteSpeed to do the redirection will be always faster than PHP.
Apache/LiteSpeed
If you’ve Apache/LiteSpeed web server, add the following code to .htaccess file:
RewriteEngine On
RewriteCond %{HTTPS} off
RewriteRule ^(.*)$ https://%{HTTP_HOST}%{REQUEST_URI} [L,R=301]
Nginx
In Nginx, add the following config:
server {
  listen 80;
  server_name domain.com www.domain.com;
  return 301 https://domain.com$request_uri;
}
Cloudflare
If you’re using Cloudflare, things are much easy. Go to SSL/TLS settings -> Edge Certificates and enable ‘Always Use HTTPS’.
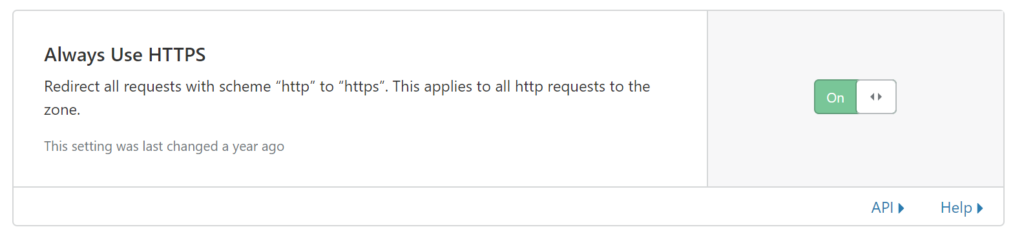
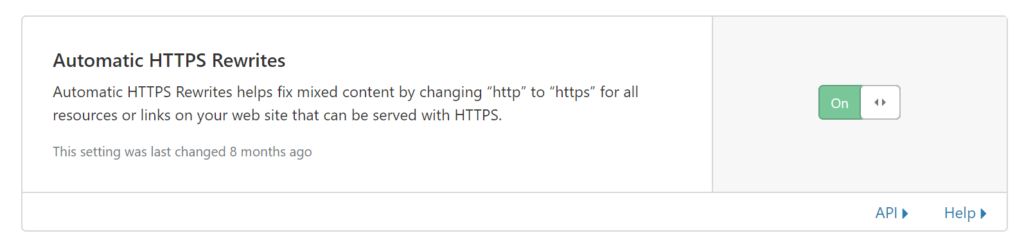
Optionally, enable ‘Automatic HTTPS Rewrites’.
Additional Tip
You can also add a meta tag to tell the browser to use HTTPS for all requests inside a page.
Step 2: Enable HSTS
HSTS or HTTP Strict Transport Security is a response header.
In simple words, this tells the browser “hey, this website will have HTTPS for X no. days, so use HTTPS by default”.
So next time when someone enters “wpspeedmatters.com” or “https://wpspeedmatters.com”, browser directly opens “https://wpspeedmatters.com”.
HSTS has some security benefits too, MitM attack (Man in the Middle attack).
Apache/LiteSpeed
Add the following code to .htaccess file:
Header set Strict-Transport-Security "max-age=31536000; includeSubDomains; preload"
Nginx
In Nginx, add the following config:
server {
    listen 443 ssl;

    add_header Strict-Transport-Security "max-age=31536000; includeSubDomains" always;
}
Cloudflare
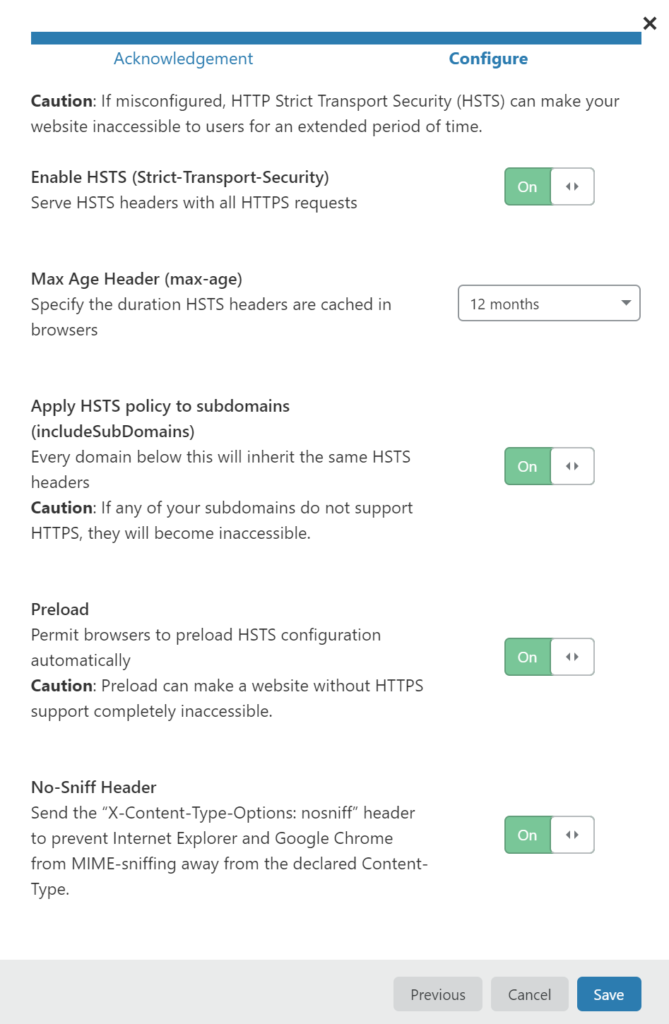
Under SSL/TLS settings -> Edge Certificates and Enable HSTS.

Configure it as below:
Verify HSTS
You can check if it’s working or not by checking the response header:

You can also visit https://hstspreload.org/ to check the same.
Step 3: Submit to Chrome HSTS List
Even if you’ve enabled HSTS, the user visiting your site for the first time will have HTTP to HTTPS redirection.
But Chrome maintains a list of HSTS enabled sites hardcoded in the browser (other browsers also use this list). So if your site is added to that list, no more redirection!
Go to https://hstspreload.org/ and submit your domain.

Conclusion
I’ve often seen redirection take ~1s in some shared hosting providers. This can affect your FCP, FMP etc.
We often test HTTPS version in testing tools like GTmetrix, Google PageSpeed Insights. But users who directly visiting our site may be from HTTP.
In my case, ~30% of the visitors are ‘direct’.
Comment below if you’ve any queries or feedback. I read and reply to each of them within 8 hours!


Comments are closed.